Enterprise Hybrid Work Job
Feature availability
Enterprise Hybrid Work Job is available in Resilio 6.0 and newer.
Overview
Enterprise Hybrid Work Job is a highly scalable data transferring workflow enabling VPN-less access to SMB shares in Windows domain environments.
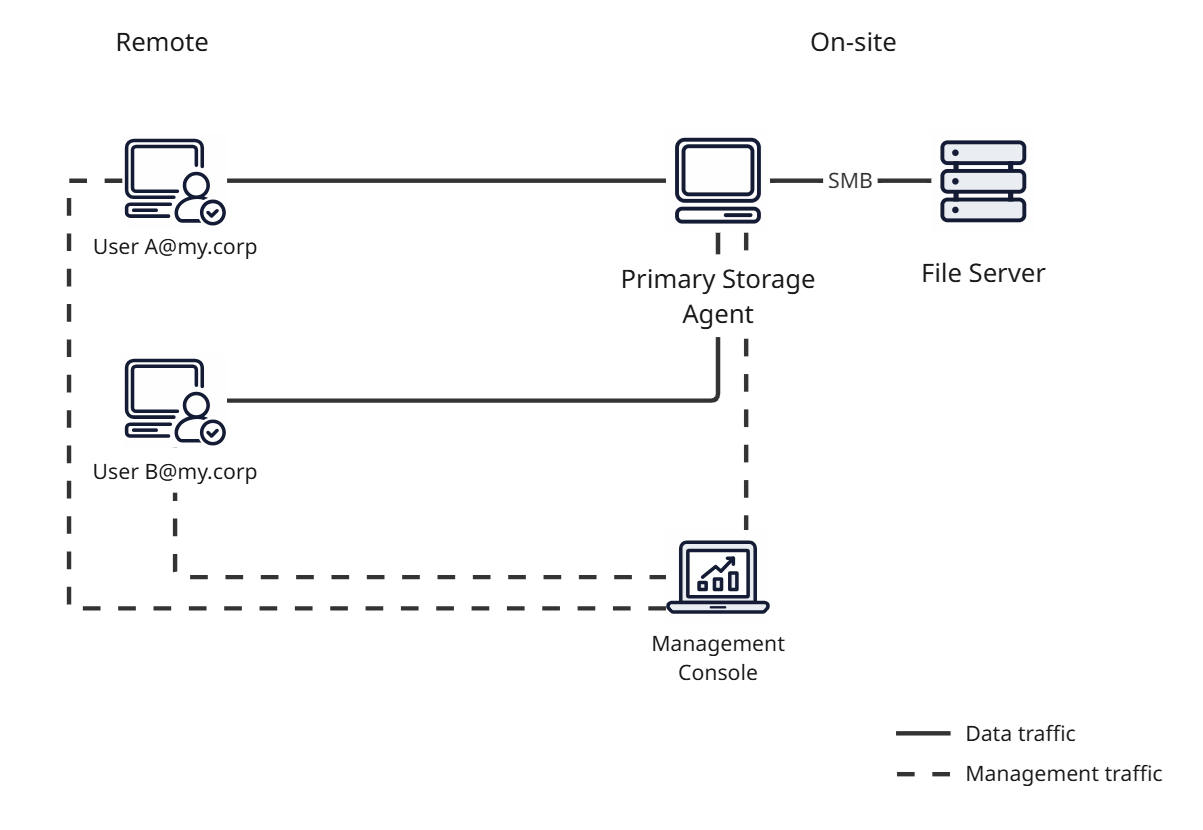
The Enterprise Hybrid Work Job type benefits include:
- Ability to access billions of files - On-demand scanning fetches meta data of top-level file system items while the end user browses the Job folder. This reduces the volume of data required to serve files to all participating Agents.
- ACL enforcement on SMB shares - End user impersonation allows preserving account information while remotely accessing storage server via the Primary Storage Agent.
- Synchronous locking - The Primary Storage Agent serves as a lock server to provide synchronous locking for files in the Job folder. This allows preventing data corruption when multiple end users access the same files either remotely or from the local network.
Prerequisites
- Enterprise Hybrid Work Job requires a Windows domain environment (Microsoft Active Directory or Entra Domain Services).
- The Management Console and the Primary Storage Agent must be deployed on domain-joined Windows Server 2022 (or newer) and have service principal names (SPNs) assigned.
- End user Agents must be deployed on Windows 11 (x64) hosts.
Resilio 6.0 - System requirements and prerequisites
For more information on system requirements and prerequisites for Enterprise Hybrid Work Jobs, see System Requirements - Resilio 6.0.
Resilio 6.0 - Quick start
For more information on setting up Resilio for Enterprise Hybrid Work Jobs, see Quick Start - Enterprise Hybrid Work Job.
Create an Enterprise Hybrid Work Job
To create an Enterprise Hybrid Work Job:
-
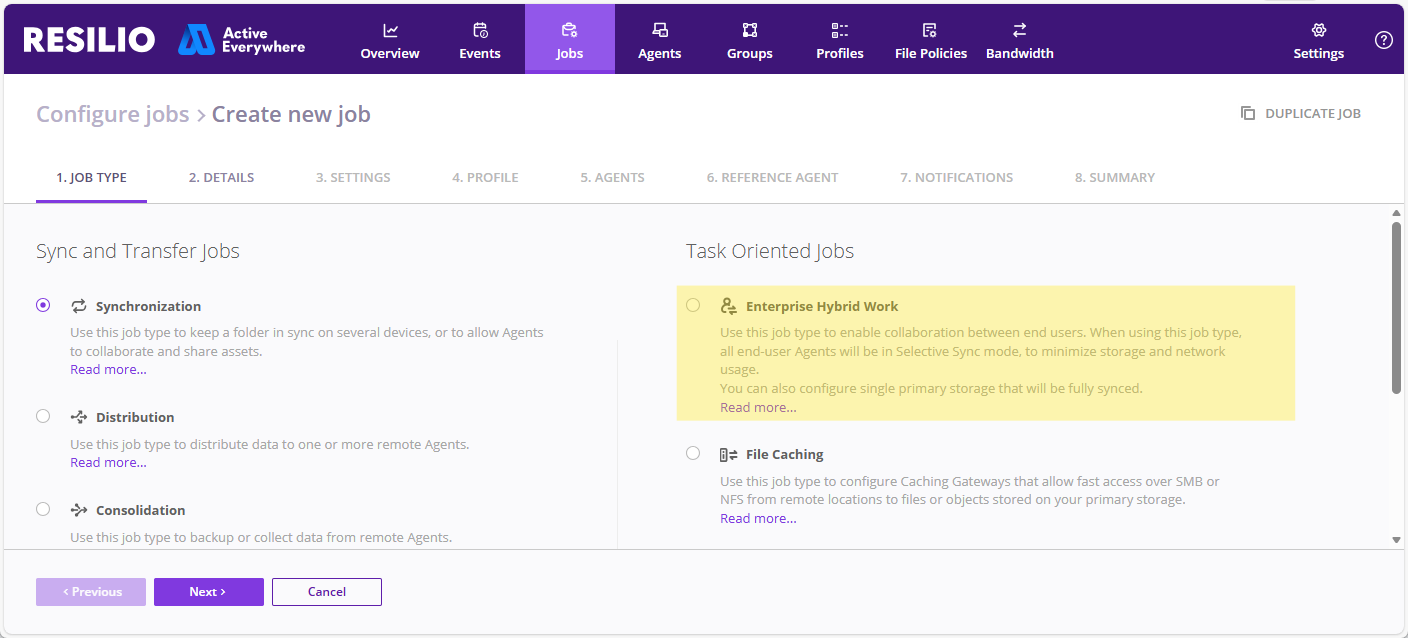
In the Management Console, select Jobs > Configure Jobs, then click + CREATE NEW JOB and select Enterprise Hybrid Work.
-
On the DETAILS tab, provide the Job name and, optionally, a description.
-
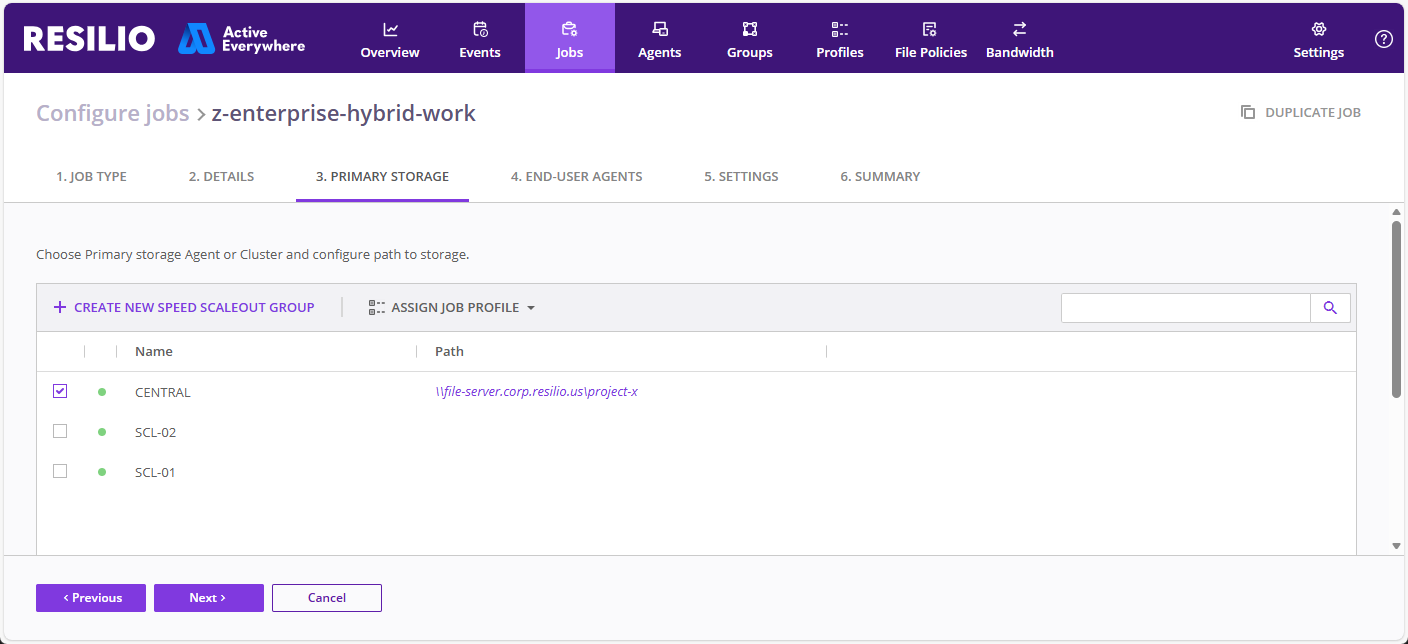
On the PRIMARY STORAGE tab, add your Primary Storage device:
Note
- Only server type Agents running on domain joined machines under Local System (machine) accounts are shown at this step.
- Only one Primary Storage instance can be selected.
- Once the Job is created, you cannot change the Primary Storage instance.
- The Primary Storage instance serves as a Lock server and the Reference Agent.
-
Select your Primary Storage Agent, then specify Job folder path:
- Click Specify path.
- Provide an SMB share or Nasuni DFS namespace path, then click Save.
Nasuni DFS namespace
When using Nasuni DFS namespace, make sure that the Primary Storage Agent's Job Profile has:
- The Follow symlinks option enabled.
- The
preserve_logical_pathcustom parameter has been added and set totrue.
Important: Primary Storage Agent Job folder path
You cannot change the Job folder path on the Primary Storage Agent once the Job is created. If you need to change the Job folder path, you will have to create a new Job.
-
Click Assign Job Profile and select Primary storage default profile.
-
(Optional) Change the service principal name fetched from the Active Directory:
Select Input SPN manually, then provide the Primary Storage device SPN.Note
Computers in Active Directory can have multiple SPNs assigned. If the SPN fetched by the Management Console is incorrect, specify the correct SPN value manually.
-
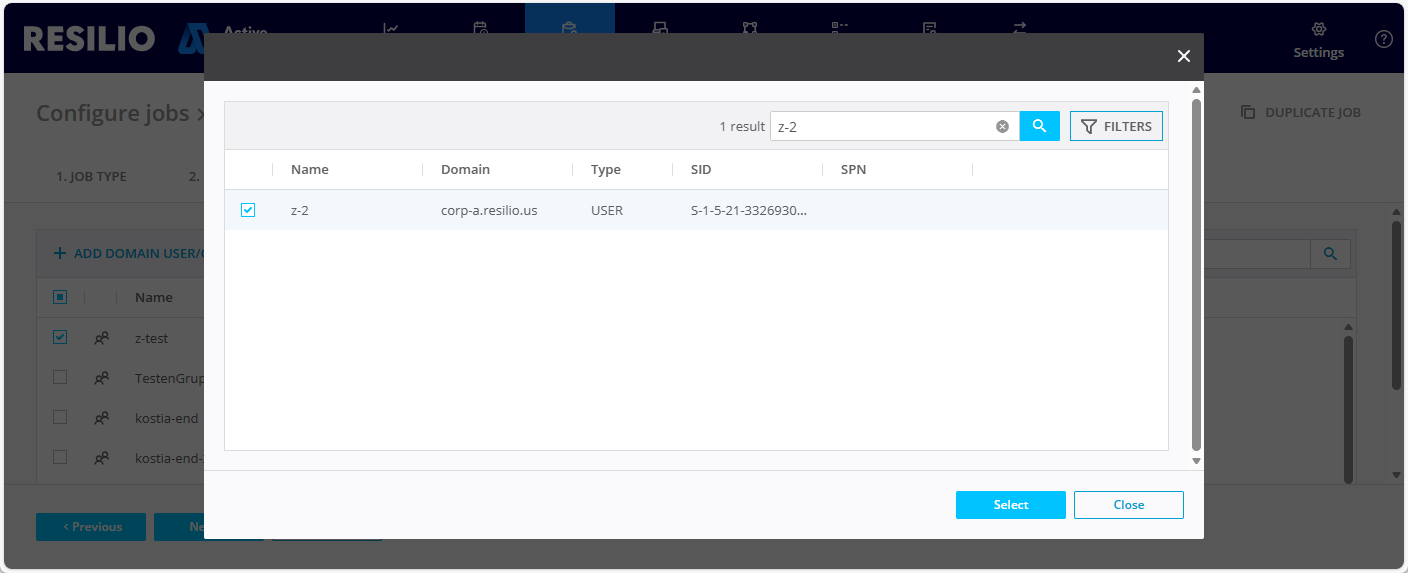
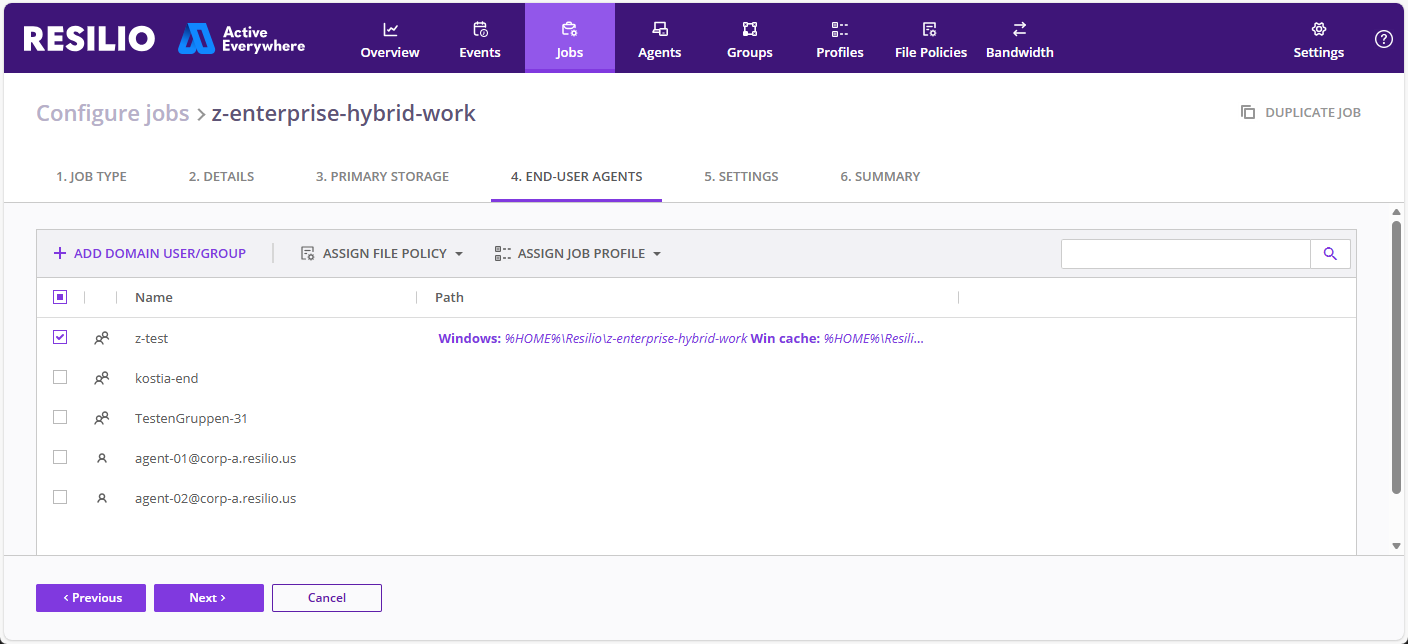
On the USERS tab choose from previously added domain groups and individual users , or add new ones.
Note
User accounts in Active Directory must have
UserPrincipalName(UPN) property assigned. For more information, see User account properties section in System Requirements - Resilio 6.0 - Active Directory.- Click + ADD DOMAIN USER/GROUP and search for a user or a group.
-
Select a user or a group, then click Select.
Tip: Multiple domains
If you cannot locate a user or a group, make sure they are in the same domain as the Management Console or a two-way trust relationship exists between the domains.
-
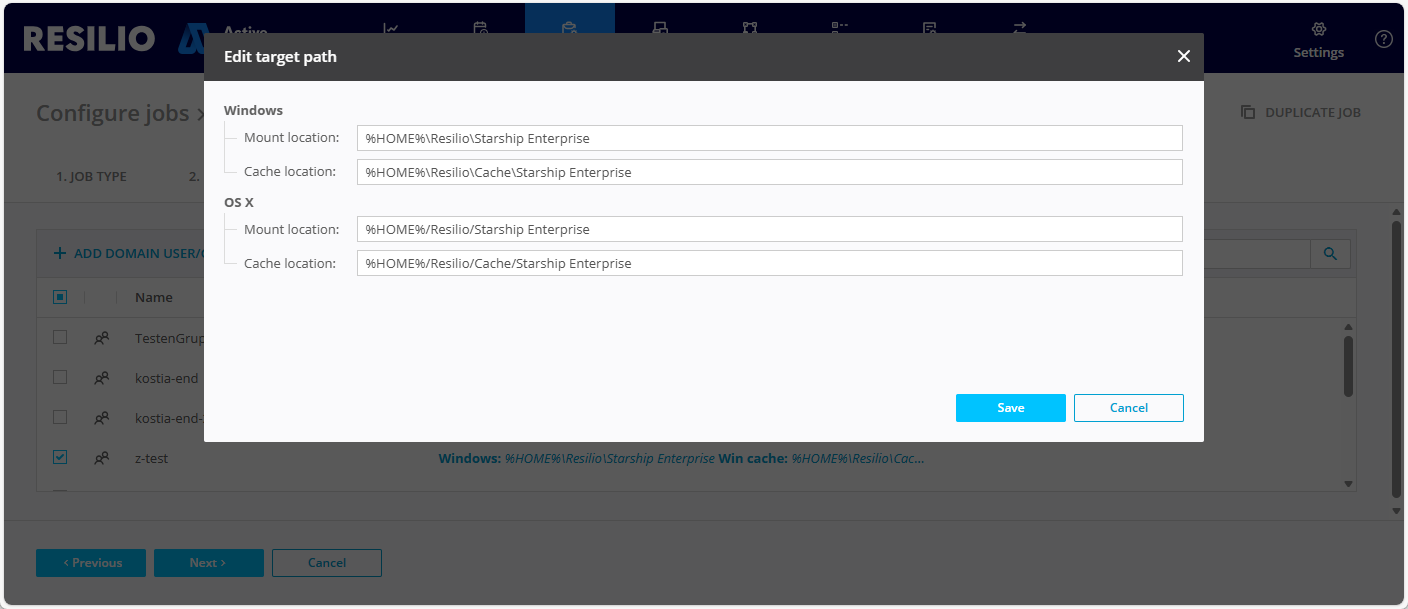
(Optional) Click the default Job folder path to change it, provide paths for mount and cache locations for end user devices, then click Save.
Tip: Map Job folder to a drive letter
Define the Mount location as
<drive_letter>:to map the Job folder to a specific drive letter, for example,M:. The drive letter must be in uppercase and not already in use by another drive.Important: External storage devices
External storage devices are not supported.
-
(Optional) Click Assign File Policy and choose a file policy that defines how Agents manage file caching depending on available storage space.
-
Click Assign Job Profile and select End-user default profile.
-
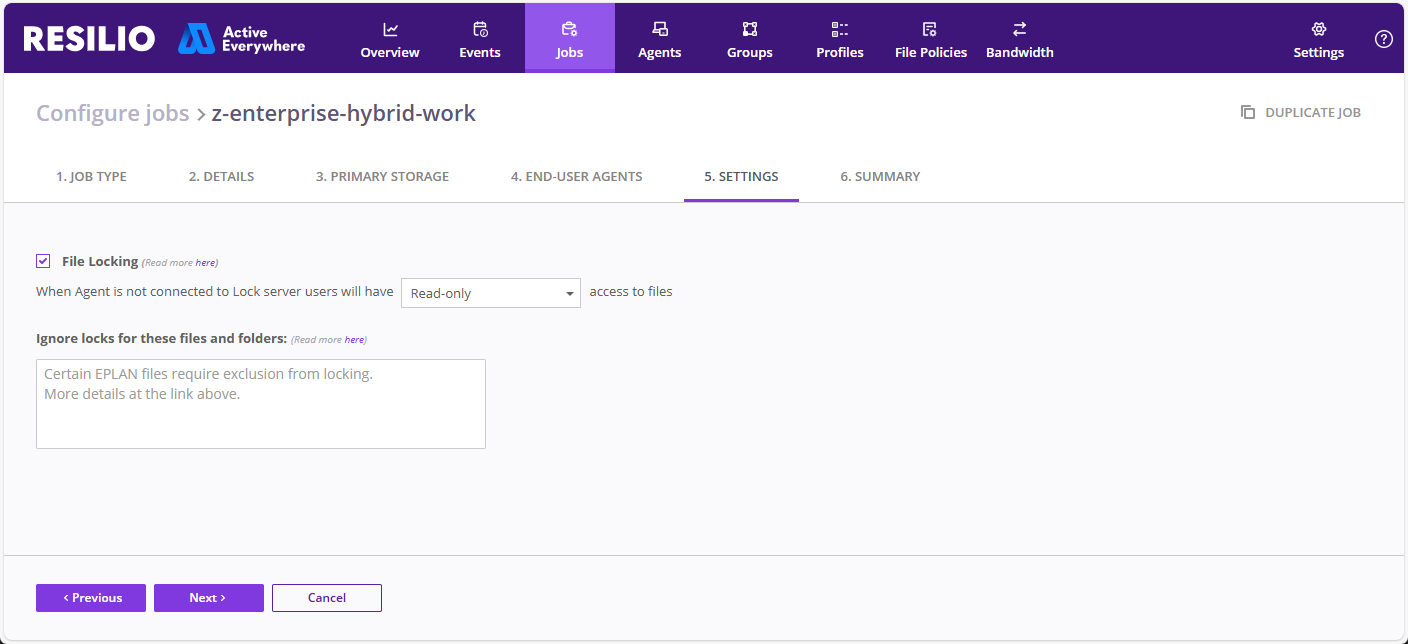
On the SETTINGS tab, adjust File Locking parameters.
Important: File locking
- Do not disable file locking.
- You cannot enable or disable file locking after the Job is created.
- Do not clear the default Ignore locks for these files and folders entry. Instead, add each new regular expression rule in a separate line.
- When Agent is not connected to Lock server - Access level to shared files when the locking server is unavailable.
- Ignore locks for these files and folders - A regular expressions (PCRE2 syntax) to match files and folders that you want to exclude from locking.
-
On the SUMMARY tab, verify your Job's configuration, then click Save.
Known issues and limitations
- Speed Scaleout Groups are not supported.
- File locking must remain enabled.
- Impersonation does not apply to highly privileged accounts, e.g. Domain Admins or Enterprise Admins.
- You cannot create and manage Enterprise Hybrid Work Jobs via API.
- You cannot change the Primary Storage Agent after the Job is created.
- You cannot change the Job folder path on the Primary Storage Agent after the Job is created.
- You cannot enable or disable file locking after the Job is created.